
Get ShipSaaS
Introducing the complete workflow for new and Premium users to get the ShipSaaS template, and the steps to clone and run it locally
Getting started with ShipSaaS is simple. This document will guide you through obtaining your template authorization, cloning the repository, and starting your local development environment.
Workflow for New Users
If you are using ShipSaaS for the first time, follow these steps to obtain your template authorization:
Step 1: Purchase ShipSaaS Premium
Visit the ShipSaaS Pricing Page, choose the plan that suits you, and click the "Get ShipSaaS" button to submit your order and complete the payment.
After payment, the system will automatically buy the "ShipSaaS Default Template" for you and redirect you to the purchased templates management page.
Step 2: View Purchased Templates
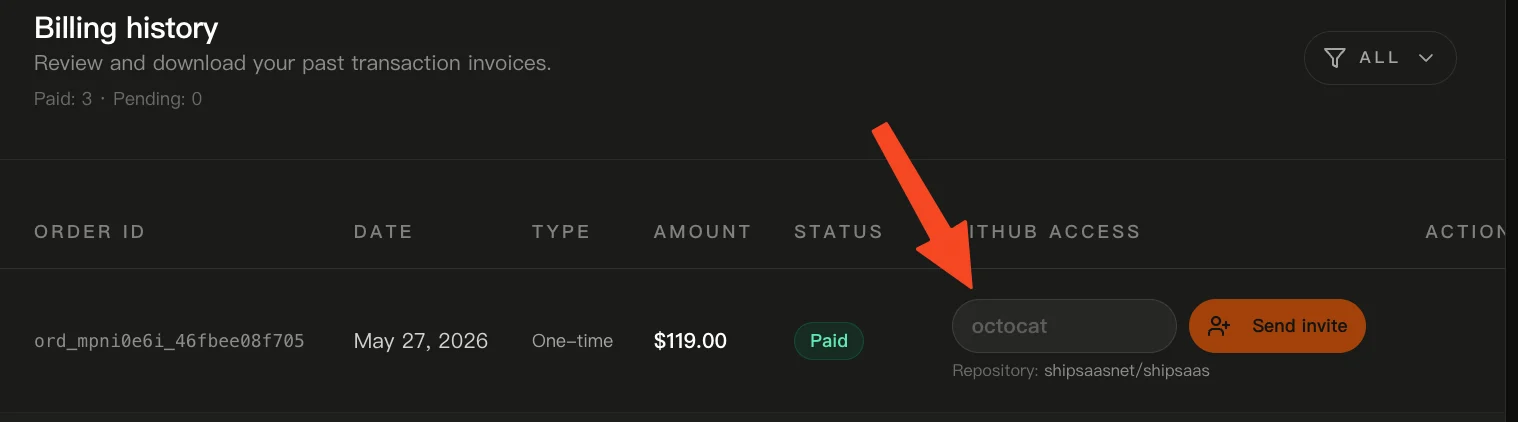
You can log in at any time and head to User Center -> Activities -> Templates to view the list of all templates you have successfully purchased.
Step 3: Activate the Template
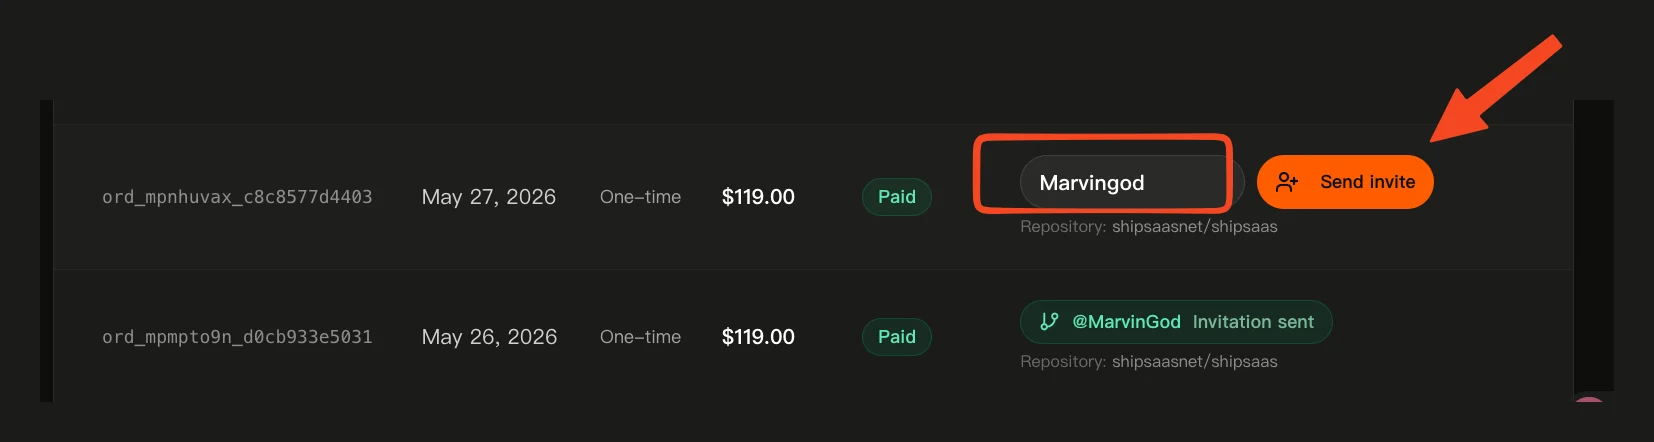
Select the template you want to use from the list, click the "Activate" button, enter the GitHub Username you want to authorize, and submit to complete the authorization binding.
Step 4: Access the Code Repository
After successful binding, directly click the activated "GitHub Username" on the purchased templates page. The system will navigate you to your private GitHub template repository.
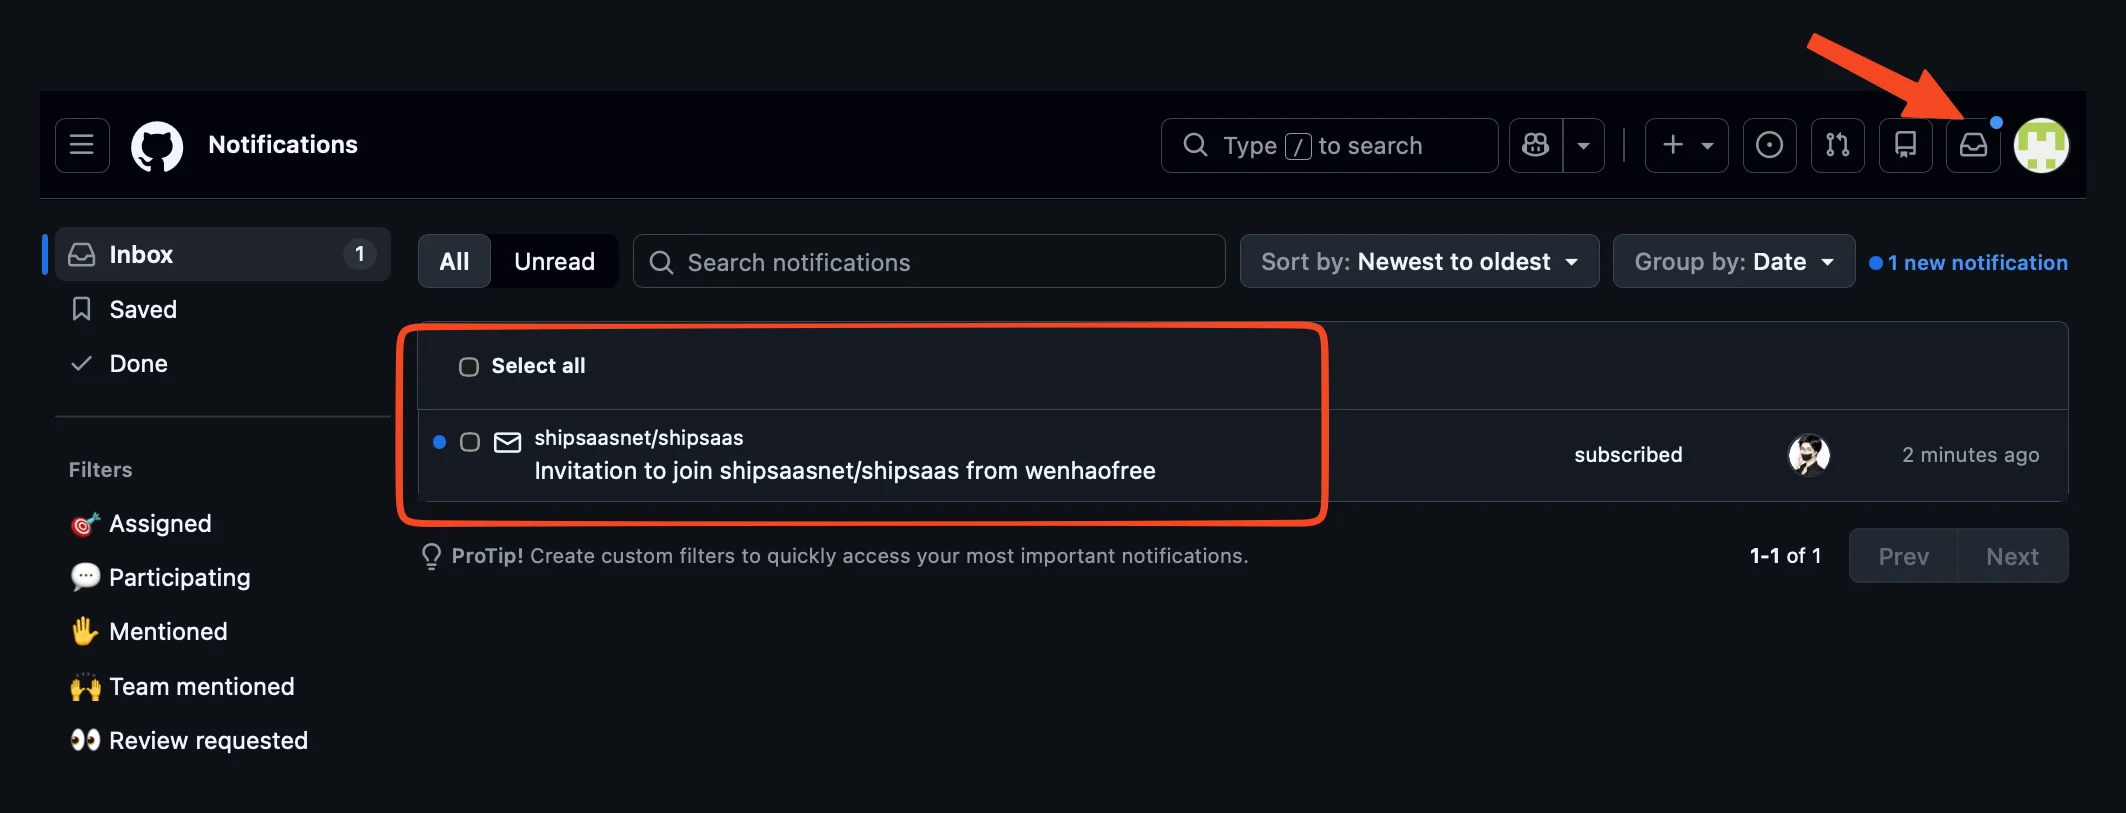
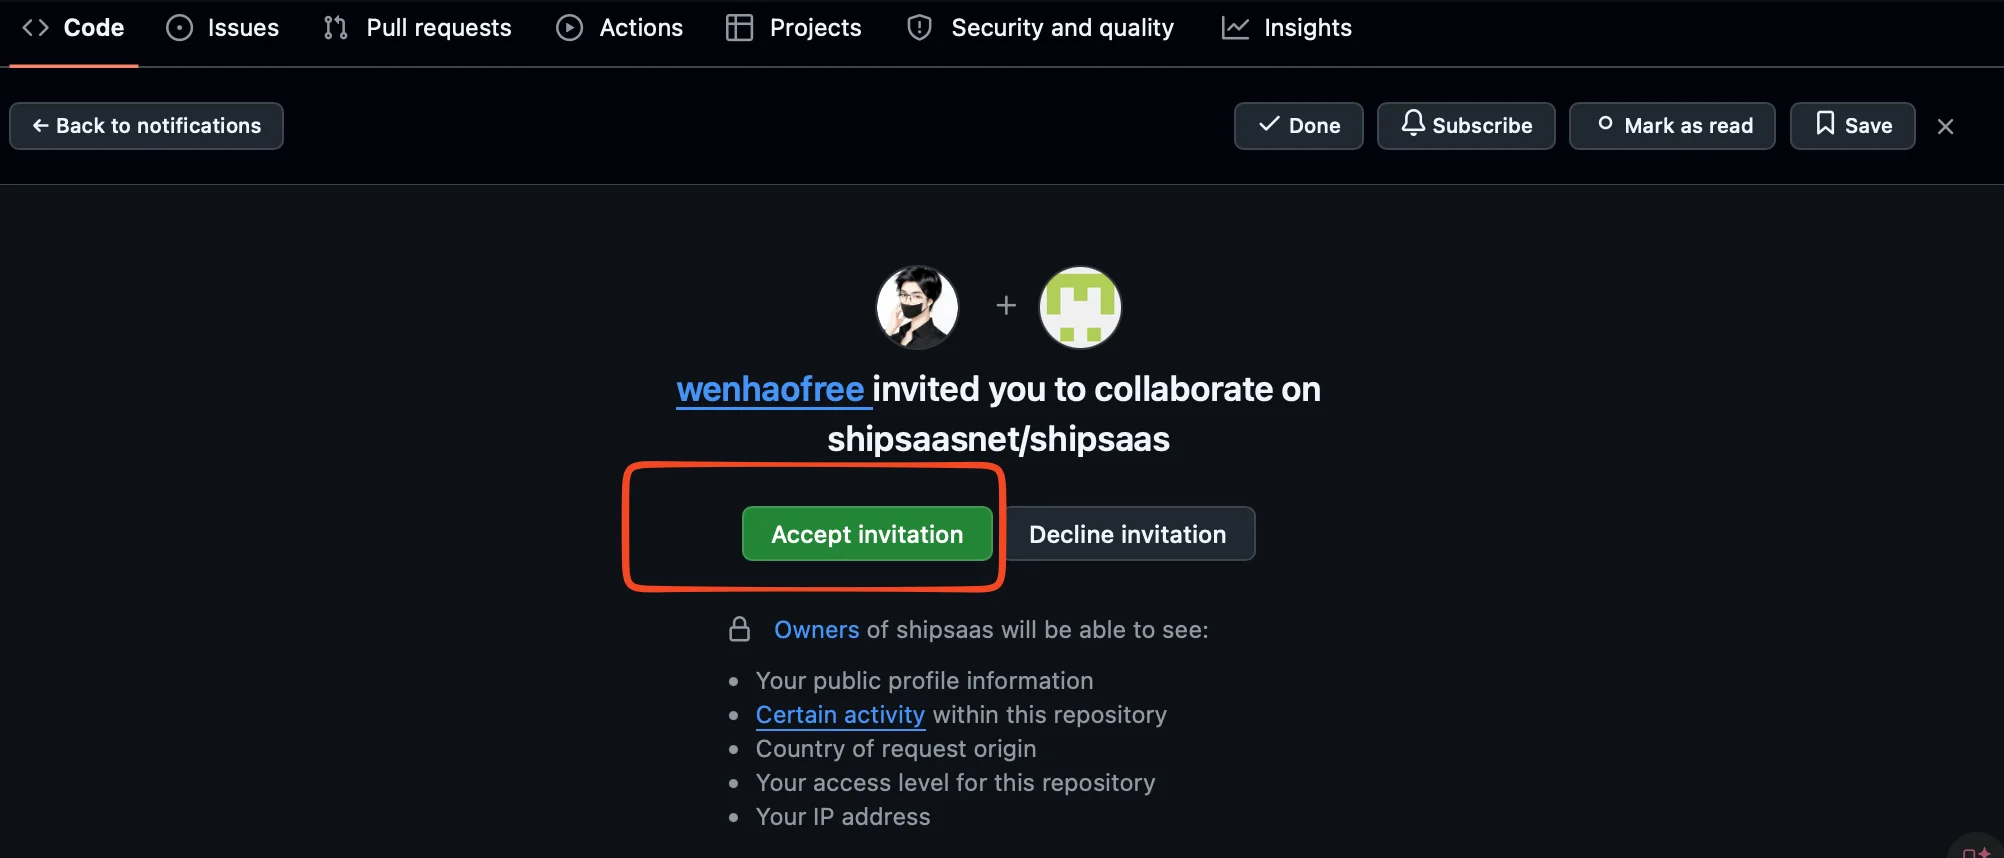
Step 5: Start Using
Clone this private repository to your local machine and run your project by referencing the Quick Start Guide.
Workflow for Lifetime (Premium) Users to Get New Templates
If you are already a ShipSaaS Premium member, you can obtain newly released official templates or third-party developer templates via these steps:
Step 1: View Purchase History
Log in and go to User Center -> Settings -> Payments to view all your historical invoices. Typically, you will see a purchase record for "ShipSaaS Premium".
Step 2: Get New Templates in the Marketplace
Visit the ShipSaaS Template Marketplace, where you can browse beautiful templates released by the official team and the community.
[!TIP] As a ShipSaaS Premium lifetime member, you can purchase all official base templates and core upgrade templates for Free ($0).
Step 3: Activate & Bind
After purchasing a new template, also head to the Purchased Templates Page, click activate, bind your GitHub account, and gain access to your private repository.
Next Steps
Now that your project is running locally, you can start deep configuration and deployment:
- Environment Configuration - Understand all environment variables in depth
- Database Configuration - Configure your Cloudflare D1 database
- Website Configuration - Customize your website logo, brand name, and navigation menu
- Deploy Website - Quickly deploy your SaaS to the Cloudflare Workers edge network